17 Existing project, GitHub last
This an explicit workflow for connecting an existing local R project to GitHub, when for some reason you cannot or don’t want to do a “GitHub first” workflow (see chapters 15 and 16).
When does this come up? Example: it’s an existing project that is already a Git repo with a history you care about. Then you have to do this properly.
This may be less desirable for a novice because there are more opportunities to get confused and make a mistake. But this workflow is not that hard, even with command line Git, and is even easier if you use conveniences from the usethis package or the RStudio IDE. All of these are covered below.
17.1 Prepare the local project
We assume you’ve got your existing R project isolated in a directory on your computer. If that’s not already true, make it so. Create a directory and marshal all the existing data and R scripts there. It doesn’t really matter where you do this, but note where the project currently lives.
I encourage you to make this project into an RStudio project, although it is not absolutely required. If you opt-out of this, the instructions using command line Git or usethis will still work for you, outside of RStudio.
17.1.1 Make or verify an RStudio Project
If the project is not already an RStudio Project, make it so:
- Within RStudio you can do: File > New Project > Existing Directory and, if you wish, “Open in new session”.
- Alternatively, from R, call
usethis::create_project("path/to/your/project"), substituting the path to your existing project directory.
If your project is already an RStudio Project, launch it.
17.1.2 Make or verify a Git repo
You should be in RStudio now, in your project.
Is it already a Git repository? The presence of the Git pane should tip you off. If yes, you’re done.
If not, you have several options:
- In the R Console, call
usethis::use_git(). - In RStudio, go to Tools > Project Options … > Git/SVN. Under “Version control system”, select “Git”. Confirm New Git Repository? Yes!
- In the shell, with working directory set to the project’s directory, do
git init.
If you used usethis or RStudio to initialize the Git repo, the Project should re-launch in RStudio.
Do that yourself if you did git init.
RStudio should now have a Git pane.
17.2 Stage and commit
If your local project was already a Git repo and was up-to-date, move on. Otherwise, you probably need to stage and commit.
- Click the “Git” tab in upper right pane
- Check “Staged” box for all files you want to commit.
- Default: stage everything
- When to do otherwise: this will all go to GitHub. So consider if that is
appropriate for each file. You can absolutely keep a file locally,
without committing it to the Git repo and sending to GitHub. Just let it
sit there in your Git pane, without being staged. No harm will be done. If
this is a long-term situation, list the file in
.gitignore.
- If you’re not already in the Git pop-up, click “Commit”
- Type a message in “Commit message”.
- Click “Commit”
17.3 Create and connect a GitHub repo
We’ll show a few methods for creating a new GitHub repo and connecting it to your local repo. Pick one.
17.3.1 Create and connect a GitHub repo with usethis
To use usethis for this task, you must have configured a personal access token (PAT). This will already by configured for anyone using HTTPS as their protocol, because they are already using the PAT to authenticate for other Git operations. But if you are an SSH person, you will need to configure a PAT, which is explained in chapter 9. It is fine to have both a PAT and SSH keys.
In your project, in the R Console, call:
usethis::use_github()
#> ✓ Creating GitHub repository 'jennybc/myrepo'
#> ✓ Setting remote 'origin' to 'https://github.com/jennybc/myrepo.git'
#> ✓ Pushing 'main' branch to GitHub and setting 'origin/main' as upstream branch
#> ✓ Opening URL 'https://github.com/jennybc/myrepo'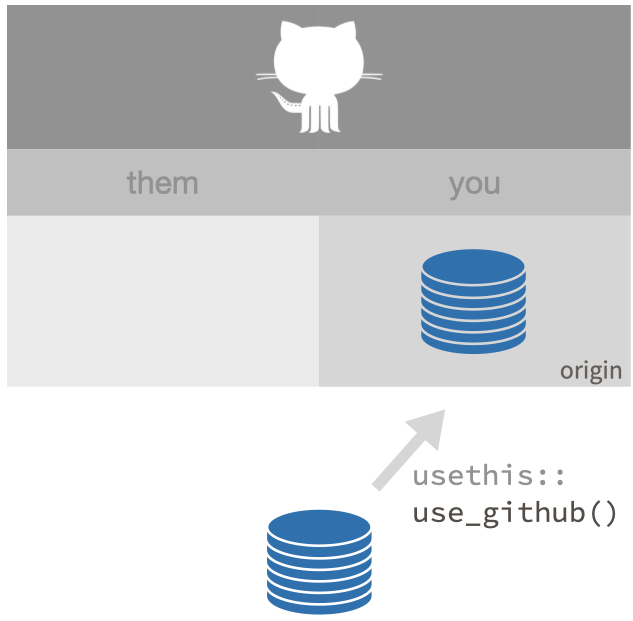
usethis::use_github() does the following:
- Creates a new repo on GitHub.
- Configures that new repo as the
originremote for the local repo. - Sets up your local default branch (e.g.
main) to track same onoriginand does an initial push. - Opens the new repo in your browser.
17.3.2 Create and connect a GitHub repo without usethis
First, you need to create a new repo on GitHub.
Go to https://github.com and make sure you are logged in.
Near “Repositories”, click the big green “New” button. Or, if you are on your own profile page, click on “Repositories”, then click the big green “New” button.
How to fill this in:
- Repository template: No template.
- Repository name: Ideally this will be the name of your local project’s directory (and RStudio Project). Why confuse yourself? But it must be a valid GitHub repo name, which means only letters, digits,
-,., or_are allowed. For future projects, think about this in advance, i.e. make sure each project’s local name is also a valid GitHub repo name. - Description: “Analysis of the stuff” or any short description of the project. Write this for humans.
- Public.
- DO NOT initialize this repository with anything.
Click the big green button that says “Create repository”.
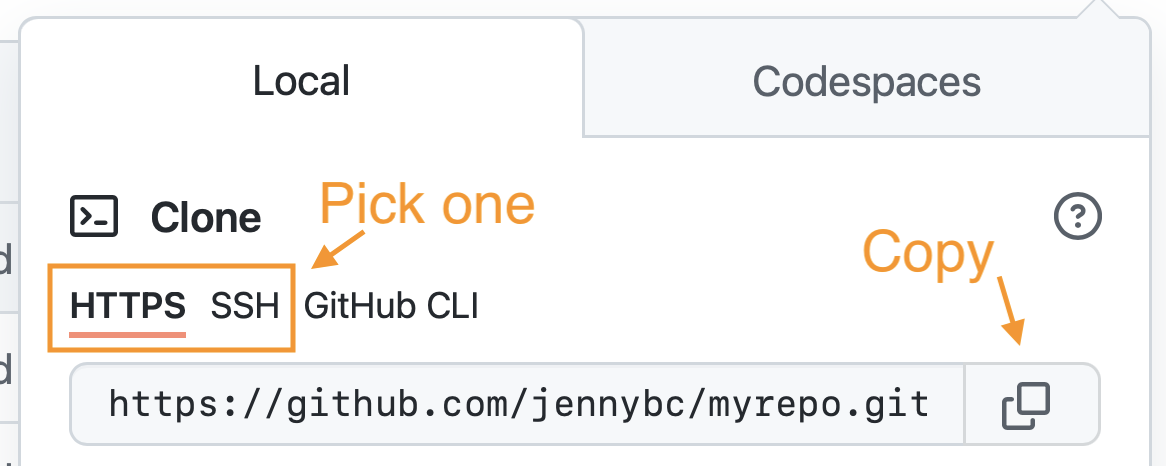
Now click the big green button that says “<> Code”.
Copy a clone URL to your clipboard. If you’re taking our default advice, copy the HTTPS URL. But if you’re opting for SSH, then make sure to copy the SSH URL.
17.3.2.1 Connect local repo to GitHub repo with RStudio
Click on the “two purple boxes and a white square” in the Git pane.
Click “Add remote”.
Paste the GitHub repo’s URL here and pick a remote name, almost certainly origin.
Now “Add”.
We should be back in the “New Branch” dialog (if not, click on the “two purple boxes and a white square” in the Git pane again).
I assume you’re on the main branch and want it to track main on GitHub (or whatever default branch you are using).
Enter main as the branch name and make sure “Sync branch with remote” is checked.
Click “Create” (yes, even though the branch already exists).
In the next dialog, choose “overwrite”.
17.3.2.2 Connect local repo to GitHub repo with the command line
In a shell, do this, substituting your URL:
git remote add origin https://github.com/jennybc/myrepo.gitPush and cement the tracking relationship between your local main branch and main on GitHub (or whatever your default branch is named):
git push --set-upstream origin main17.4 Confirm the local files propagated to the GitHub remote
Go back to the browser. I assume we’re still viewing your new GitHub repo.
Refresh.
You should see all the project files you committed there.
If this project already had a Git history, it should be reflected on GitHub.
17.5 The end
Now just “lather, rinse, repeat”. Do work somewhere: locally or on GitHub. Commit it. Push it or pull it, depending on where you did the work, but get local and remote “synced up”. Repeat.
Note that in general (and especially in future when collaborating with other developers) you will usually need to pull changes from the remote (GitHub) before pushing the local changes you have made. For this reason, it’s a good idea to try and get into the habit of pulling before you attempt to push.